Microsoft Power Automate: The Teenage Years

In this post, I chart the growth of Power Automate over the course of its relatively short but meaningful existence. I also discuss some IT concerns that Power Automate, and the citizen developers building solutions with it, need to acknowledge and address in order to reach maturity and realize their full potential.

Power Automate: The Early Years

This post isn’t a “what is Power Automate” writeup – I have to assume you understand (or at least have heard about) Power Automate to some degree. That being said, if you feel like you could use a little more background or information about Power Automate, use the inline links I’m supplying and References and Resources section at the bottom of this post to investigate further.

Long story short, Power Automate is a member of Microsoft’s Power Platform collection of tools. The goal of the Power Platform is to make business solution capabilities that were previously available only to software developers available to the masses. These “citizen developers” can use Power Platform tools to build low-code or no-code business solutions and address needs without necessarily involving their organization’s formal IT group/department.

Power Automate, in particular, is of particular significance to those of us who consider ourselves SharePoint practitioners. Power Automate has been fashioned and endorsed by Microsoft as the replacement for SharePoint workflows – including those that may have been created previously in SharePoint Designer. This is an important fact to know, especially since SharePoint 2010 Workflows are no longer available for use in SharePoint Online (SPO), and SharePoint 2013 workflows are slated for the chopping block at some point in the not-so-distant future.

Such Promise!

Given that Power Automate was first released in 2016, it has been very successful in a relatively short time – both as a workflow replacement and as a highly effective way to enable citizen developers (and others) to address their own business process needs without needing to involve format IT.

Power Automate (and the Power Platform in general) represents a tremendous amount of potential value for average users consuming Microsoft 365 services in some form or fashion. Power Automate’s reach and applications go well beyond SharePoint alone. Assuming you have a Microsoft 365 subscription, just look at your Power Automate home/launch page to get an idea of what you can do with it. Here’s a screenshot of my Power Automate home page.

Looking at the top-four Power Automate email templates, we can see that the tool goes beyond mere SharePoint workflows:

Checking out the Files and Documents prebuilt templates, we find:

The list of prebuilt templates go on for miles. There are literally thousands of them that can be used as-is or as a starting point for the process you are trying to build and/or automate.

And to further drive home the value proposition, Power Automate can connect to nearly any system with a web service. Microsoft also maintains a list of pre-built connectors that can be used to tie-in data from other (non-Microsoft) systems into Power Automate. Just a few examples of useful connectors:

Power Automate is typically thought of as being a cloud-only tool, but that’s really not true. The lesser-known reality is that Power Automate can be used with on-premises environments and data provided the right hybrid data gateway is setup between the on-premises environment and the cloud.

But Such a Rebellious Streak!

Like all children, Power Automate started out representing so much promise and goodness, and that really hasn’t changed at all. But as PowerAutomate has grown in adoption and gained widespread usage, we have been seeing signs of “teen rebellion” and the frustration that comes with it. Sure, Power Automate has demonstrated ample potential … but it has some valuable lessons to learn and needs to mature in several areas before it will be recognized and accepted as an adult.

Put another way: in terms of providing business process modeling and execution capabilities that are accessible to a wide audience, Power Automate is a resounding success. Where PowerAutomate needs help growing (or obtaining support) is with a number of ALM (application lifecycle management) concerns. 

These concerns – things like source (code) management, documentation, governance, deployment support, and more – are the areas that formalized IT organizations typically consider “part of the job” and have processes/solutions to address. The average citizen developer, likely not having been a member of an IT organization, is oftentimes blissfully unaware of these concerns until something goes wrong.

Previous workflow and business process tools (like SharePoint Designer) struggled with these IT-centric non-functional requirements. This is one of the reasons SharePoint Designer was “lovingly” called SharePoint Destroyer by those of us who worked with and (more importantly) had to support what had been created with it. Microsoft was aware of this perceived deficit, and so Power Automate (and the rest of the Power Platform) was handled differently.

A Growth Plan

Microsoft is in a challenging position with Power Automate and the overall Power Platform. One of Power Automate’s most compelling aspirations is enabling the creation of low- and no-code solutions by average users (citizen developers). Prior to the Power Platform, these solutions typically had to be constructed by developers and other formalized IT groups. And since IT departments were typically juggling many of these requests and other demands like them, the involvement of IT oftentimes introduced unexpected delays, costs, bureaucracy, etc., into the solutioning process.

But by (potentially) taking formalized IT out of the solutioning loop, how do these non-functional requirements and project needs get addressed? In the past, many of these needs would only get addressed if someone had the foresight, motivation, and training to address them – if they were even recognized as requirements in the first place.

With the Power Platform, Microsoft has acknowledged the need to educate and assist citizen developers with non-functional requirements. It has released a number of tools, posts, and other materials to help organizations and their citizen developers who are trying to do the right thing. Here are a handful of resources I found particularly helpful:

Some Guidance Counseling

When I was in high school (many, many years ago), I was introduced to the concept of a guidance counselor. A guidance counselor is someone who can provide assistance and advice to high school students and their parents. Since high school students are oftentimes caught between two worlds (childhood and adulthood), a guidance counselor can help students figure out their next steps and act as supportive and objective sounding boards for the questions and decisions teenagers commonly face.

High school guidance counseling isn’t really accurate in the case of Power Automate, but the analogy makes more sense if we swap-out “high school” and insert “technical.” After all, citizen developers understand their business needs and the problems they’re trying to solve. Oftentimes, though, they could use some advice and assistance in the end-to-end solutioning process – especially with non-functional requirements. They need help to ensure that they don’t sabotage their own self-interests by building something that can’t be maintained, isn’t documented, can’t be deployed, or will run afoul of their IT partners and overarching IT policies/governance.

The aim of the links in the A Growth Plan section (above) is to provide some basis and a starting point for the non-functional concerns we’ve discussed a bit thus far. Generally speaking, Microsoft has done a solid job covering many technical and non-technical non-functional requirements surrounding Power Automate and solutions built from Power Automate.

I give my “solid job” thumbs-up on the basis of what I know and have focused on over the years. If I review the supplied links and the material that they share through the eyes of a citizen developer, though, I find myself getting confused quickly – especially as we get into the last few links and the content they contain. I suspect some citizen developers may have heard of Git, GitHub, Azure DevOps, Visual Studio Code, and the various other acronyms and products frequently mentioned in the linked resources. But is it realistic to expect citizen developers to understand how to use (or even recognize) a CLI takes or be well-versed in properly formed JSON? In my frank opinion: “no.”

The Microsoft docs and articles I’ve perused (and shared links above) have been built with a slant towards the IT crowd and their domain knowledge set, and that’s not particularly helpful for who I envision citizen developers to be. The documents and technical guides tend to assume a little too much knowledge to be helpful to those trying to build no-code and low-code business solutions.

Thankfully, citizen developers have additional allies and tools becoming available to them on an ever-increasing basis.

Pulling The Trigr

One of the most useful tools I’ve been introduced to more recently doesn’t come from Microsoft. It comes from Encodian, a Microsoft Partner building tools and solutions for the Microsoft 365 platform and various Azure workloads. The specific Encodian tool that is of interest to me (a self-described SharePoint practitioner) is called Trigr, and in Encodian’s words Trigr can “Make Power Automate Flows available across multiple and targeted SharePoint Online sites. Possible via a SharePoint Framework (SPFx) Extension, users can access Flows from within SharePoint Online libraries and lists.”

A common challenge with SharePoint-based Power Automate flows is that they are built in situ and attached to the list they are intended to operate against. This makes them hard to repurpose, and if you want to re-use a Power Automate flow on one or more other lists, there’s a fair bit of manual recreation/manipulation necessary to adjust steps, change flow parameter values, etc.

Trigr allows Power Automate flow creators to design a flow one time and then re-use that flow wherever they’d like. Trigr takes care of handling and passing parameters, attaching new instances of the Power Automate flow to additional lists, and handling a lot of the grunt work that takes the sparkle away from Power Automate.

Have a look at the following video for a more concrete demonstration.

As I see it, Trigr is part of a new breed of tools that tries (and successfully manages) to walk the fine line between citizen developers’ limited technical knowledge/capabilities and organizational IT’s needs/requirements that are geared towards keeping PowerAutomate-based solutions documented, controlled, repeatably deployable, operating reliably/consistently, and generally “under control.”

Trigr is a SaaS application/service that has its own web-based administrative console that provides you with installation resources, “how to” guidance, the mechanism for parameterizing your Power Automate flows, deployment support, and other service functionality. A one-time installation and setup within the target SPO tenant is necessary, but after that, subsequent Trigr functionality is in the hands of the citizen developer(s) tasked with responsibility for the business process(es) modeled in Power Automate. And Trigr’s documentation, guidance, and general product language reflect this (largely) non-technical or minimally technical orientation possessed by the majority of citizen developers.

Reaching Maturity

I have faith that Power Automate is going to continue to grow, gain greater adoption, and mature. Microsoft has given us some solid guidance and tools to address non-functional requirements, and interested third-parties (like Encodian) are also meeting citizen developers where they currently operate – rather than trying to “drag them” someplace they might not want to be.

At the end of the day, though, one key piece of Power Automate (Power Platform) usage and the role citizen developers occupy is best summed-up by this quote from rabbi and author Joshua L. Liebman:

Maturity is achieved when a person postpones immediate pleasures for long-term values.

Helping Power Automate and citizen developers mature responsibly requires patience and guidance from those of us in formalized IT. We need to aid and guide citizen developers as they are exposed to and try to understand the value and purpose that non-functional requirements serve in the solutions they’re creating. We can’t just assume they’ll inherently know. The reason we do the things we do isn’t necessarily obvious – at times, even to many of us.

Those of us in IT also need to see Power Automate and the larger Power Platform as another enabling tool in the organizational chest that can be used to address business process needs. Rather than an “us versus them” mentality, everyone would benefit from us embracing the role of guidance counselor rather than adversarial sibling or disapproving parent.

References and Resources

    1. Microsoft: Power Automate
    2. Microsoft: Power Platform
    3. Gartner: Citizen Developer Definition
    4. Microsoft Support: Overview of workflows included with SharePoint
    5. Microsoft Support: Introducing SharePoint Designer
    6. Microsoft Support: SharePoint 2010 workflow retirement
    7. Microsoft Learn: All about the product retirement plan (workflows, designer etc.)
    8. Microsoft Learn: Plan and prepare for Power Automate in 2022 release wave 2
    9. Microsoft: Office is becoming Microsoft 365
    10. Link: Power Automate home/launch page
    11. Microsoft Power Automate: Save Outlook.com email attachments to your OneDrive
    12. Microsoft Power Automate: Save Gmail attachments to your Google Drive
    13. Microsoft Power Automate: Notify me on Teams when I receive an email with negative sentiment
    14. Microsoft Power Automate: Analyze incoming emails and route them to the right person
    15. Microsoft Power Automate: Start an approval for new file to move it to a different folder
    16. Microsoft Power Automate: Read information from invoices
    17. Microsoft Power Automate: Start approval for new documents and notify via Teams
    18. Microsoft Power Automate: Track emails in an Excel Online (Business) spreadsheet
    19. Microsoft Power Automate: Templates
    20. Microsoft Learn: List of all Power Automate connectors
    21. Microsoft Learn: Adobe PDF Services
    22. Microsoft Learn: DocuSign
    23. Microsoft Learn: Google Calendar
    24. Microsoft Learn: JIRA
    25. Microsoft Learn: MySQL
    26. Microsoft Learn: Pinterest
    27. Microsoft Learn: Salesforce
    28. Microsoft Learn: YouTube
    29. Microsoft Learn: What is an on-premises data gateway?
    30. Red Hat: What is application lifecycle management (ALM)?
    31. Splunk: What Is Source Code Management?
    32. CIO: What is IT governance? A formal way to align IT & business strategy
    33. Wikipedia: Non-functional requirement
    34. TechNet: SharePoint 2010 Best Practices: Is SharePoint Designer really pure evil?
    35. Microsoft Learn: Microsoft Power Platform guidance documentation
    36. Microsoft Learn: Power Platform adoption maturity model: Goals and opportunities
    37. Microsoft Learn: Admin and governance best practices
    38. Microsoft Learn: Introduction: Planning a Power Automate project
    39. Microsoft Learn: Application lifecycle management (ALM) with Microsoft Power Platform
    40. Microsoft Learn: Create packages for the Package Deployer tool
    41. Microsoft Learn: SolutionPackager tool
    42. Microsoft Learn: Source control with solution files
    43. Betterteam: Guidance Counselor Job Description
    44. Atlassian Bitbucket: What is Git
    45. TechCrunch: What Exactly Is GitHub Anyway?
    46. Microsoft Learn: What is Azure DevOps?
    47. Wikipedia: Visual Studio Code
    48. TechTarget: command-line interface (CLI)
    49. JSON.org: Introducing JSON
    50. Nintex: What is a citizen developer and where do they come from?
    51. Encodian: An award-winning Microsoft partner
    52. Microsoft Power Automate Community Forums: Reuse flow
    53. YouTube: ‘When a user runs a Trigr’ Deep Dive
    54. Encodian: Encodian Trigr App Deployment and Installation
    55. Encodian: (Trigr) General Guidance
    56. Encodian: ‘When a user runs a Trigr’ overview
    57. Wikipedia: Joshua L. Liebman

Launching Your SPO Site or Portal

In this short post I cover the SharePoint Online (SPO) Launch Scheduling Tool and why you should get familiar with it before you launch a new SPO site or portal.

Getting Set To Launch Your SPO Site?

I’ve noted that my style of writing tends to build the case for the point I’m going to try to make before actually getting to the point. This time around, I’m going to lead with one of my main arguments:

Don’t do “big bang” style launches of SPO portals and sites; i.e., making your new SPO site available to all potential users as once! If you do, you may inadvertently wreck the flawless launch experience you were hoping (planning?) for.

Why "Big Bang" Is A Big Mistake

SharePoint Online (SPO) is SharePoint in the cloud. One of the benefits inherent to the majority of cloud-resident applications and services is “elasticity.” In case you’re a little hazy on how elasticity is defined and what it affords:

“The degree to which a system is able to adapt to workload changes by provisioning and de-provisioning resources in an autonomic manner, such that at each point in time the available resources match the current demand as closely as possible”

This description of elasticity helps us understand why a “big bang”-style release comes with some potential negative consequences: it goes against (rather than working with) the automatic provisioning and deprovisioning of SPO resources that serve-up the site or portal going live.

SPO is capable of reacting to an increase in user load through automated provisioning of additional SharePoint servers. This reaction and provisioning process is not instantaneous, though, and is more effective when user load increases gradually rather than all-at-once.

The Better Approach

Microsoft has gotten much better in the last bunch of years with both issuing (prescriptive) guidance and getting the word out about that guidance. And in case you might be wondering: there is guidance that covers site and portal releases.

One thing I feel compelled to mention every time I give a presentation or teach a class related to the topic at hand is this extremely useful link:

https://aka.ms/PortalHealth

The PortalHealth link is the “entry point” for planning, building, and maintaining a healthy, high performance SPO site/portal. The page at the end of that link looks like this:

I’ve taken the liberty of highlighting Microsoft’s guidance for launching portals in the screenshot above. In short, The CliffsNotes version of that guidance is this: “Launch in waves.”

The diagram that appears below is pretty doggone old at this point (I originally saw it in a Microsoft training course for SPO troubleshooting), but I find that it still does an excellent job of graphically illustrating what a wave-based/staggered rollout looks like.

Each release wave ends up introducing new users to the site. By staggering the growing user load over time, SPO’s automated provisioning mechanisms can react and respond with additional web front-ends (WFEs) to the farm (since the provisioning process isn’t instantaneous). An ideal balance is achieved when WFE capacity can be added at a rate that keeps pace with additional users in the portal/site.

Are There More Details?

As a matter of fact, there are.

In July of this year (2021), Microsoft completed the rollout of its launch scheduling tool to all SPO environments (with a small number of exceptions). The tool not only schedules users, but it manages redirects so that future waves can’t “jump the gun” and access the new portal until the wave they’re in is officially granted access. This is an extremely useful control mechanism when you’re trying to control potential user load on the SPO environment.

The nicest part of the scheduling tool (for me) is the convenience with which it is accessed. If you go to your site’s Settings dropdown (via the gear icon), you’ll see the launch scheduler link looking you in the face:

There is some “fine print” that must be mentioned. First, the launch scheduling tool is only available for use with (modern) Communication Sites. In case any of you were still hoping (for whatever reason) to avoid going to modern SharePoint, this is yet another reminder that modern is “the way” forward …

If you take a look at a screenshot of the scheduler landing page (below), you’ll note the other “fine print” item I was going to mention:

Looking at the lower left quandrant of the image, you’ll see a health assessment report. That’s right: much like a SharePoint root site swap, you’ll need a clean bill of health from the SharePoint Page Diagnostics Tool before you can schedule your portal launch using the launch scheduling tool. 

Microsoft is trying to make it increasingly clear that poorly performing sites and portals need to addressed; after all, non-performant portals/sites have the potential to impact every SPO tenant associated with the underlying farm where your tenant resides.

(2021-09-15) ADDENDUM: Scott Stewart (Senior Program Manager at Microsoft and all-around good guy) pinged me after reading this post and offered up a really useful bit of additional info. In Scott’s own words: “It may be good to also add in that waves allow the launch to be paused to fix any issues with custom code / web parts or extensions and is often what is needed when a page has customizations.” 

As someone who’s been a part of a number of portal launches in the past, I can attest to the fact that portal launches seldom go off without a hitch. The ability to pause a launch to remediate or troubleshoot a problem condition is worth scheduler-controlled rollout alone!

Conclusion

The Portal Launch Scheduler is a welcome addition to the modern SharePoint Online environment, especially for larger companies and organizations with many potential SPO users. It affords control over the new site/portal launch process to control load and give the SPO environment the time it needs to note growing user load and provision additional resources. This helps to ensure that your portal/site launch will make a good (first) impression rather than the (potentially) lousy one that would be made with a “big bang” type of launch.

References and Resources

SPFest and SPO Performance

In this brief post, I talk about my first in-person event (SPFest Chicago) since COVID hit. I also talk about and include a recent interview with the M365 Developer Podcast.

It's Alive ... ALIVE!

SharePoint Fest Chicago 2021I had the good fortune of presenting at SharePoint Fest Chicago 2021 at the end of July (about a month ago). I was initially a little hesitant on the drive up to Chicago since it was the first live event that I was going to do since COVID-19 knocked the world on its collective butt.

Although the good folks at SPFest required proof of vaccination or a clear COVID test prior to attending the conference, I wasn’t quite sure how the attendees and other speakers would handle standard conference activities. 

Thankfully, the SPFest folks put some serious thought into the topic and had a number of systems in-place to make everyone feel as “at ease” as possible – including a clever wristband system that let folks know if you were up for close contact (like a handshake) or not. I genuinely appreciated these efforts, and they allowed me to enjoy my time at the conference without constant worries.

Good For The Soul

I’m sure I’m speaking for many (if not all) of you when I say that “COVID SUCKS!” I’ve worked from my home office for quite a few years now, so I understand the value of face-to-face human contact because it’s not something I get very often. With COVID, the little I had been getting dropped to none.

I knew that it would be wonderful to see so many of my fellow speakers/friends at the event, but I wasn’t exactly prepared for just how elated I’d be. I’m not one to normally say things like this, but it was truly “good for my soul” and something I’d been desperately missing. It truly was, and I know I’m not alone in those thoughts and that specific perception.

Although these social interactions weren’t strictly part of the conference itself, I’d wager that they were just as important to others as they were to me.

There are still a lot of people I haven’t caught up with in person yet, but I’m looking forward to remedying that in the future – provided in-person events continue. I still owe a lot of people hugs.

Speaking Of ...

In addition to presenting three sessions at the conference, I also got to speak with Paul Schaeflein and talk about SharePoint Online Performance for a podcast that he co-hosts with Jeremy Thake called the M365 Developer Podcast. Paul interviewed me at the end of the conference as things were being torn down, and we talked about SharePoint Online performance, why it mattered to developers, and a number of other topics.

I’ve embedded the podcast below:

Paul wasn’t actually speaking at the conference, but he’s a Chicagoan and he lived not-too-far from the conference venue … so he stopped down to see us and catch some interviews. It was good to catch up with him and so many others.

The interview with me begins about 13 minutes into the podcast, but I highly recommend listening to the entire podcast because Paul and Jeremy are two exceptionally knowledgeable guys with a long history with Microsoft 365 and good ol’ SharePoint.

CORRECTION (2021-09-14): in the interview, I stated that Microsoft was working to enable Public CDN for SharePoint Online (SPO) sites. Scott Stewart reached-out to me recently to correct this misstatement. Microsoft isn’t working to automatically enable Public CDN for SPO sites but rather Private CDN (which makes a lot more sense in the grand scheme of things). Thanks for the catch, Scott!

References and Resources

  1. Conference: SharePoint Fest Chicago 2021
  2. Centers for Disease Control and Prevention: COVID-19
  3. Blog: Paul Schaeflein
  4. Blog: Jeremy Thake
  5. Podcast: M365 Developer Podcast

Faster Access to Office Files in Microsoft Teams

While we were answering (or more appropriately, attempting to answer) questions on this week’s webcast of the Microsoft Community Office Hours, one particular question popped-up that got me thinking and playing around a bit. The question was from David Cummings, and here was what David submitted in its entirety:

with the new teams meeting experience, not seeing Teams under Browse for PowerPoint, I’m aware that they are constantly changing the file sharing experience, it seems only way to do it is open sharepoint ,then sync to onedrive and always use upload from computer and select the location,but by this method we will have to sync for most of our users that use primarily teams at our office

Reading David’s question/request, I thought I understood the situation he was struggling with. There didn’t seem to be a way to add an arbitrary location to the list of OneDrive for Business locations and SharePoint sites that he had Office accounts signed into … and that was causing him some pain and (seemingly) unnecessary work steps.

What I’m about to present isn’t groundbreaking information, but it is something I’d forgotten about until recently (when prompted by David’s post) and was happy to still find present in some of the Office product dialogs.

Can't Get There From Here

I opened-up PowerPoint and started poking around the initial page that had options to open, save,  export, etc.,for PowerPoint presentations. Selecting the Open option on the far left yielded an “Open” column like the one seen on the left.

The “Open” column provided me with the option to save/load/etc. from a OneDrive location or the any of the SharePoint sites associated with an account that had been added/attached to Office, but not an arbitrary Microsoft Teams or SharePoint site.

SharePoint and OneDrive weren’t the only locations from which files could be saved or loaded. There were also a handful of other locations types that could be integrated, and the options to add those locations appeared below the “Open” column: This PC, Add a Place, and Browse.

Selecting This PC swapped-out the column of documents to the right of the “Open” column with what I regarded as a less-functional local file system browser. Selecting Add a Place showed some potential promise, but upon further investigation I realized it was a glorified OneDrive browser: 

But selecting Browse gave me what appeared to be a Windows common file dialog. As I suspected, though, there were actually some special things that could be done with the dialog that went beyond the local file system:

It was readily apparent upon opening the Browse file dialog that I could access local and mapped drives to save, load, or perform other operations with PowerPoint presentations, and this was consistent across Microsoft Office. What wasn’t immediately obvious, though, was that the file dialog had unadvertised goodies.

Dialog on Steroids

What wasn’t readily apparent from the dialog’s appearance and labels was that it had the ability to open SharePoint-resident files directly. It could also be used to browse SharePoint site structures and document libraries to find a file (or file location) I wished to work with.

Why should I care (or more appropriately, why should David care) that this can be done? Because SharePoint is the underlying storage location for a lot of the data -including files – that exist and are surfaced in Microsoft Teams.

Don’t believe me? Follow along as I run a scenario that highlights the SharePoint functionality in-action through a recent need of my own.

Accounts Accounts Everywhere

As someone who works with quite a few different organizations and IT shops, it probably comes as no real surprise for me to share that I have a couple dozen sets of Microsoft 365 credentials (i.e., usernames and associated passwords). I’m willing to bet that many of you are in a similar situation and wish there were a faster way to switch between accounts since it seems like everything we need to work with is protected by a different login.

Office doesn’t allow me to add every Microsoft 365 account and credential set to the “quick access” list that appears in Word, PowerPoint, Excel, etc. I have about five different accounts and associated locations that I added to my Office quick access location list. This covers me in the majority of daily circumstances, but there are times when I want to work with a Teams site or other repository that isn’t on my quick access list and/or is associated with a seldom-used credential set.

A Personal Example

Not too long ago, I had the privilege of delivering a SharePoint Online performance troubleshooting session at our recent M365 Cincinnati & Tri-State Virtual Friday event. Fellow MVP Stacy Deere-Strole and her team over at Focal Point Solutions have been organizing these sorts of events for the Cincinnati area for the last bunch of years, but the pandemic affecting everyone necessitated some changes this year. So this year, Stacy and team spun up a Microsoft Team in the Microsoft Community Teams environment to coordinate sessions and speaker activities (among other things).

Like a lot of speakers who present on Microsoft 365 topics, I have a set of credentials in the msftcommunity.com domain, and those are what I used to access the Teams team associated with M365 Cincinnati virtual event:

When I was getting my presentation ready for the event, I needed access to a couple of PowerPoint presentations that were stored in the Teams file area (aka, the associated SharePoint Online document library). These PowerPoint files contained slides about the event, the sponsors, and other important information that needed to be included with my presentation:

At the point when I located the files in the Teams environment, I could have downloaded them to my local system for reference and usage. If I did that, though, I wouldn’t have seen any late-breaking changes that might have been introduced to the slides just prior to the virtual event.

So, I decided to get a SharePoint link to each PowerPoint file through the ellipses that appeared after each file like this:

Choosing Copy Link from the context-sensitive menu popped-up another dialog that allowed me to choose either a Microsoft Teams link or a SharePoint file link. In my case, I wanted the SharePoint file link specifically:

Going back to PowerPoint, choosing Open, selecting Browse, and supplying the link I just copied from Teams …

… got me this dialog:

Well that wasn’t what I was hoping to see at the time.

I remembered the immortal words of Douglas Adams, “Don’t Panic” and reviewed the link more closely. I realized that the “can’t open” dialog was actually expected behavior, and it served to remind me that there was just a bit of cleanup I needed to do before the link could be used.

Reviewing the SharePoint link in its entirety, this is what I saw:

https://msftcommunity.sharepoint.com/sites/M365CincinnatiTriStateUserGroup-Speakers/_layouts/15/Doc.aspx?OR=teams&action=edit&sourcedoc={C8FF1D53-3238-44EA-8ECF-AD1914ECF6FA}

Breaking down this link, I had a reference to a SharePoint site’s Doc.aspx page in the site’s _LAYOUTS special folder. That was obviously not the PowerPoint presentation of interest. I actually only cared about the site portion of the link, so I modified the link by truncating everything from /_layouts to the end. That left me with:

https://msftcommunity.sharepoint.com/sites/M365CincinnatiTriStateUserGroup-Speakers

I went back into PowerPoint with the modified site link and dropped it in the File name: textbox (it could be placed in either the File name: textbox or the path textbox at the top of the dialog; i.e., either of the two areas boxed in red below):

When I clicked the Open button after copying in the modified link, I experienced some pauses and prompts to login. When I supplied the right credentials for the login prompt(s) (in my case, my @msftcommunity.com credentials), I eventually saw the SharePoint virtual file system of the associated Microsoft Team:

The PowerPoint files of interest to me were going to be in the Documents library. When I drilled into Documents, I was aware that I would encounter a layer of folders: one folder for each Channel in the Team that had files associated with it (i.e., for each channel that has files on its Files tab).  It turns out that only the Speakers channel had files, so I saw: 

Drilling into the Speakers folder revealed the two PowerPoint presentations I was interested in:

And when I selected the desired file (boxed above) and clicked the Open button, I was presented with what I wanted to see in PowerPoint:

Getting Back

At this point, you might be thinking, “That seems like a lot of work to get to a PowerPoint file in SharePoint.” And honestly, I couldn’t argue with that line of reasoning. 

Where this approach starts to pay dividends, though, is when we want to get back to that SharePoint document library to work with additional files – like the other PowerPoint file I didn’t open when I initially went in to the document library.

Upon closing the original PowerPoint file containing the slides I needed to integrate, PowerPoint was kind enough to place a file reference in the Presentations area/list of the Open page:

That file reference would hang around for quite some time depending on how many different files I would open over time. If I wanted the file I just worked with to hang around longer, I always had the option of pinning it to list.

But if I was done with that specific file, what do I care? Well, you may recall that there’s still another file I needed to work with in that resides in the same SharePoint location … so while the previous file reference wasn’t of any more use to me, the location where it was stored was something I had an interest in.

Fun fact: each entry in the Presentations tab has a context-sensitive menu associated with it. When I right-clicked the highlighted filename/entry, I saw:

And when I clicked the Open file location menu selection, I was taken back to the document library where both of the PowerPoint files resided:

Re-opening the SharePoint document library may necessitate re-authenticating a time or two along the way … but if I’m still within the same PowerPoint session and authenticated to the SharePoint site housing the files at the time, I won’t be prompted.

Either way, I find this “repeat experience” more streamlined than making lots of local file copies, remembering specific locations where files are stored, etc.

Conclusion

This particular post didn’t really break any new ground and may be common information to many of you. My memory isn’t what it once was, though, and I’d forgotten about the “file dialogs on steroids” when I stopped working regularly with SharePoint Designer a number of years back. I was glad to be reminded thanks to David.

If nothing else, I hope this post served as a reminder to some that there’s more than one way to solve common problems and address recurring needs. Sometimes all that is required is a bit of experimentation.

References and Resources

A Quick Look At The Get-PnPGroup Cmdlet And Its Operation

Why This Particular Topic?

I wouldn’t be surprised if some of you might be saying and asking, “Okay, that’s an odd choice for a post – even for you. Why?”

If you’re one of those people wondering, I would say that the sentiment and question are certainly fair. I’m actually writing this as part of my agreed upon “homework” from last Monday’s broadcast of the Community Office Hours podcast (I think that’s what we’re calling them). If you’re not immediately familiar with this particular podcast and its purpose, I’ll take two seconds out to describe.

I was approached one day by Christian Buckley (so many “interesting experiences” seem to start with Christian Buckley) about a thought he had. He wanted to start doing a series of podcasts each week to address questions, concerns, problems, and other “things” related to Office 365, Microsoft Teams, and all the O365/M365 associated workloads. He wanted to open it up as a panel-style podcast, and although anyone could join, he was interested in rounding-up a handful of Microsoft MVPs to “staff” the podcast in an ongoing capacity. The idea sounded good to me, so I said “Count me in” even before he finished his thoughts and pitch.

I wasn’t sure what to expect initially … but we just finished our 22nd episode this past Monday, and we are still going strong. The cast on the podcast rotates a bit, but there are a few of us that are part of what I’d consider the “core group” of entertainers …

The podcast has actually become something I look forward to every Monday, especially with the pandemic and the general lack of in-person social contact I seem to have (or rather, don’t have). We do two sections of the podcast every Monday: one for EMEA at 11:00am EST and the other for APAC at 9:00pm EST. You can find out more about the podcast in general through the Facebook group that’s maintained. Alternatively, you can send questions and things you’d like to see us address on the podcast to OfficeHours@CollabTalk.com.

If you don’t want (or have the time) to watch the podcast live, an archive of past episodes exists on Christian’s site, I maintain an active playlist of the recorded episodes on YouTube, and I’m sure there are other repositories available.

Ok, Got It. “Your Homework,” You Say?

The broadcasts we do normally have no fixed format or agenda, so we (mostly Christian) tend to pull questions and topics to address from the Facebook group and other places. And since the topics are generally so wide-ranging, it goes without saying that we have viable answers for some topics … but there are plenty of things we’re not good at (like telephony) and freely tell you so.

Whenever we get to a question or topic that should be dealt with outside the scope of the podcast (oftentimes to do some research or contact a resource who knows the domain), we’ll avoid BSing too much … and someone will take the time to research the topic and return back the following week with what they found or put together. We’re trying to tackle a bunch of questions and topics each week, and none of us is well-versed in the entire landscape of M365. Things just change so darn fast these days ….

So, my “homework” from last week was one of these topics. And I’m trying to do one better than just report back to the podcast with an answer. The topic and research may be of interest to plenty of people – not just the person who asked about it originally. Since today is Sunday, I’m racing against the clock to put this together before tomorrow’s podcast episodes …

The Topic

Rather than trying to supply a summary of the topic, I’m simply going to share the post and then address it. The inquiry/post itself was made in the Office 365 Community Facebook group by Bilal Bajwa. Bilal is from Milwaulkee, Wisconsin, and he was seeking some PowerShell-related help:

Being the lone developer in our group of podcast regulars (and having worked a fair bit with the SharePointPnP Cmdlets for PowerShell and PowerShell in general), I offered to take Bilal’s post for homework and come back with something to share. As of today (Sunday, 8/23/2020), the post is still sitting in the Facebook group without comment – something I hope to change once this blog post goes live in a bit.

SharePointPnP Cmdlets And The Get-PnPGroup Cmdlet Specifically

If you’re a SharePoint administrator and you’re unfamiliar with the SharePoint Patterns and Practices group and the PowerShell cmdlets they maintain, I’M giving YOU a piece of homework: read the Microsoft Docs to familiarize yourself with what they offer and how they operate. They will only help make your job easier. That’s right: RTFM. Few people truly enjoy reading documentation, but it’s hard to find a better and more complete reference medium.

If you are already familiar with the PnP cmdlets … awesome! As you undoubtedly know, they add quite a bit of functionality and extend a SharePoint administrator’s range of control and options within just about any SharePoint environment. The PnP group that maintains the cmdlets (and many other tools) are a group of very bright and very giving folks.

Vesa Juvonen is one name I associate with pretty much anything PnP. He’s a Principal Program Manager at Microsoft these days, and he directs many of the PnP efforts in addition to being an exceptionally nice (and resourceful!) guy.

The SharePoint Developer Blog regularly covers PnP topics, and they regularly summarize and update PnP resource material – as well as explain it. Check out this post for additional background and detail.

Cmdlet: Get-PnPGroup

Now that I’ve said all that, let’s get started with looking at the Get-PnPGroup cmdlet that is part of the SharePointPnP PowerShell module. I will assume that you have some skill with PowerShell and have access to a (SharePoint) environment to run the cmdlets successfully. If you’re new to all this, then I would suggest reviewing the Microsoft Docs link I provide in this blog post, as they cover many different topics including how to get setup to use the SharePoint PnP cmdlets.

In his question/post, Bilal didn’t specify whether he was trying to run the Get-PnPGroup cmdlet against a SharePoint Online (SPO) site or a SharePoint on-premises farm. The operation of the SharePointPnP cmdlets, while being fairly consistent and predictable from cmdlet to cmdlet, sometimes vary a bit depending on the version of SharePoint in-use (on-premises) or whether SPO is being targeted. In my experience, the exposed APIs and development surfaces went through some enhancement after SharePoint 2013 in specific areas. One such area that was affected was data pertaining to site users and their alerts; the data is available in SharePoint 2016 and 2019 (as well as in SPO), but it’s inaccessible in 2013.

Because of this, it is best to review the online documentation for any cmdlet you’re going to use. Barring that, make sure you remember the availability of the documentation if you encounter any issues or behavior that isn’t expected.

If we do this for Get-PnPGroup, we frankly don’t get too much. The online documentation at Microsoft Docs is relatively sparse and just slightly better than auto-generated docs. But we do get a little helpful info:

We can see from the docs that this cmdlet runs against all versions of SharePoint starting with SharePoint 2013. I would therefore expect operations to be generally be consistent across versions (and location) of SharePoint.

A little further down in the documentation for Get-PnPGroup (in Example 1), we find that simply running the cmdlet is said to return all SharePoint groups in a site. Let’s see that in practice.

Running Wild

I fired up a VM-based SharePoint 2019 farm I have to serve as the target for on-prem tests. For SPO, I decided to use my family’s tenant as a test target. Due to time constraints, I didn’t get a chance to run anything against my VM environment, so I’m assuming (dangerous, I know) that on-prem results will match SPO. If they don’t, I’m sure someone will tell me below (in the Comments) …

Going against SPO involves connecting to the tenant and then executing Get-PnPGroup. The initial results:

Running Get-PnPGroup returned something, and it’s initially presented to us in a somewhat condensed table format that includes ID, (group) Title, and LoginName.

But there’s definitely more under the hood than is being shown here, and that “under the hood” part is what I suspect might have been causing Bilal some issues when he looked at his results.

We’ve all probably heard it before at some point: PowerShell is an object-oriented scripting language. This means that PowerShell manipulates and works with Microsoft .NET objects behind-the-scenes for most things. What may appear as a scalar value or simple text data on first inspection could be just the tip of the “object iceberg” when it comes to PowerShell.

Going A Bit Deeper

To learn a bit more about what the function is actually returning upon execution, I ran the Get-PnPGroup cmdlet again and assigned the function return to a variable I called $group (which you can see in the screen capture earlier). Performing this variable assignment would allow me to continue working with the function output (i.e., the SharePoint groups) without the need to keep querying my SharePoint environment.

To display the contents of $group with additional detail, the PowerShell I executed might appear a little cryptic for those who don’t live in PowerShellLand:

$group | fl

There’s some shorthand in play with that last bit of PowerShell, so I’ll spell everything out. First, fl is the shorthand notation for the Format-List cmdlet. I could have just as easily typed …

$group | Format-List

… but that’s more typing! I’m no different than anyone else, and I like to get more done with less whenpossible.

Next, the pipe (“|”) will be familiar to most PowerShell practitioners, and here it’s used to send the contents of the $group variable to the Format-List cmdlet. The Format-List cmdlet then expands the data piped to it (i.e., the SharePoint groups in $group) and shows all the property values that exist for each SharePoint group.

If you’re not familiar with .NET objects or object-oriented development, I should point out that the SharePoint groups returned and assigned to our $group variable are .NET objects. Knowing this might help your understanding – or maybe not. Try not to worry if you’re not a dev and don’t speak dev. I know that to many admins, devs might as well be speaking jive …

For our purposes today, we’re going to limit our discussion and analysis of objects to just their properties – nothing more. The focus still remains PowerShell.

What Are The Actual Properties Available To Us?

If you’re asking the question just posed, then you’re following along and hopefully making some kind of sense of a what I’m sharing.

So, what are the properties that are exposed by each of the SharePoint groups? Looking at the output of the $group variable sent to the Format-List command (shown earlier) gives you an idea, but there’s a much quicker and more reliable way to get the listing of properties.

You may not like what I’m about to say, but it probably won’t surprise you: those properties are documented (for everyone to learn about) in Microsoft Docs. Yes, another documentation reference!

How did I know what to look/search for? If you refer to the end of the reference for the Get-PnPGroup cmdlet, there is a section that describes the “Outputs” from running the cmdlet. That output is only one line of text, and it’s exactly what we need to make the next hop in our hunt for properties details:

List<Microsoft.SharePoint.Client.Group>

A List is a .NET collection class, but that’s not important for our purposes. Simply put, you can think of a .NET List as a “bucket” into which we put other objects – including our SharePoint groups. The class/type that is identified between the “<” and “>” after List specify the type of each object in the List. In our case, each item in the List is of type Microsoft.SharePoint.Client.Group.

If you search for that class type, you’ll get a reference in your search results that points to a Microsoft Docs link serving as a reference for the SharePoint Group type we’re interested in. And if we look at the “Properties” link of that particular reference, each of the properties that appear in our returned groups are spelled out with additional information – in most cases, at least basic usage information is included.

A quick look at those properties and a review of one of the groups in the $group variable (shown below) should convince you that you’re looking at the right reference.

What Do We Do Now?

You might recall that we’re going through this exercise of learning about the output from the Get-PnPGroup cmdlet because Bilal asked the question, “Any idea how to filter?”

Hopefully the output that’s returned from the cmdlet makes some amount of sense, and I’ve convinced you (and Bilal) that it’s not “garbage” but a List collection of .NET objects that are all of the Microsoft.SharePoint.Client.Group type.

At this point, we can leave our discussion of .NET objects behind (for the most part) and transition back to PowerShell proper to talk about filtering. We could do our filtering without leaving .NET, but that wouldn’t be considered the “PowerShell way” of doing it. Just remember, though: there’s almost always more than one way to get the results you need from PowerShell …

Filtering The Results

In the case of my family’s SPO tenant, there are a total of seven (7) SharePoint groups in the main site collection:

Looking at a test case for filtering, I’m going to try to get any group that has “McDonough” in its name.

A SharePoint group’s name is the value of the Title property, and a very straightforward way to filter a collection of objects (which we have identified exists within our $group variable) is through the use of the Where-Object cmdlet.

Let’s setup some PowerShell that should return only the subset of groups that I’m interested in (i.e., those with “McDonough” in the Title). Reviewing the seven groups in my site collection, I note that only three (3) of them contain my last name. So, after filtering, we should have precisely three groups listed.

Preparing the PowerShell …

$group | where-object {$_.Title -like "*McDonough*"}

… and executing this, we get back the filtered results predicted and expected; i.e., three SharePoint groups:

For those that could use a little extra clarification, I will summarize what transpired when I executed that last line of PowerShell.

  1. From our previous Get-PnPGroup operation, we knew that the $group variable contained the seven groups that exist in my site collection.
  2. We piped (“|”) that unfiltered collection of groups to the Where-Object cmdlet. It’s worth pointing out that the cmdlets and most of the other strings/text in PowerShell are case-insensitive (Where-Object, where-object, and WhErE-oBjEcT are all the same from a PowerShell processing perspective).
  3. The curly braces after the where-object cmdlet define the logic that will be processed for each object (i.e., SharePoint group) that is passed to the where-object cmdlet.
  4. Within the curly braces, we indicated that we wanted to filter and keep each group that had a Title which was like “*McDonough*” This was accomplished with the -like operator (PowerShell has many other operators, too). The asterisks before and after “McDonough” are simply wildcards that will match against anything with “McDonough” in the Title – regardless of any text or characters appearing before and/or after “McDonough”
  5. Also worth nothing within the curly braces is the “$_.” notation. When iterating through the collection of SharePoint groups, the “$_.” denotes the current object/group we’re evaluating – each one in turn.

Round Two

Let’s try another one before pulling the plug (figuratively and literally – it’s close to my bed time …)

Let’s filter and keep only the groups where the members of the group can also edit the group membership. This is an uncommon scenario, and we might wish to know this information for some potential security tightening.

Looking at the properties available on the Group type, I see the one I’m interested in: AllowMembersEditMembership. It’s a boolean value, and I want back the groups that have a value of true (which is represented as $true in PowerShell) for this property.

$group | where-object {$_.AllowMembersEditMembership -eq $true}

Running the PowerShell just presented, we get only one matching group back:

Frankly, that’s one more group than I originally expected, so I should probably take a closer look in the ol’ family site collection …

Summary

I hope this helped you (and Bilal) understand that there is a method to PowerShell’s madness. We just need to lean on .NET and objected oriented concepts a bit to help us get what we want.

The filtering I demonstrated was pretty basic, and there are numerous ways to take it further and get more specific in your filtering logic/expressions. If you weren’t already comfortable with filtering, I hope you now know that it isn’t really that hard.

If I happened to skip or gloss over something important, please leave me a note in the Comments section below. My goal was to provide a complete-enough picture to build some confidence – so that the next time you need to work with objects and filter them in PowerShell, you’ll feel comfortable doing so.

Have fun PowerShelling!

References And Resources

  1. LinkedIn: Christian Buckley
  2. Podcast History: Microsoft Community Office Hours from 8/18/2020
  3. BuckleyPLANET: Community category and activities
  4. Facebook Group: Office 365 Community
  5. Email Group: OfficeHours@CollabTalk.com
  6. YouTube: Microsoft Community Office Hours playlist
  7. Microsoft Docs: PnP PowerShell Overview
  8. LinkedIn: Vesa Juvonen
  9. Blog: SharePoint Developer Blog
  10. Blog Post: Microsoft 365 & SharePoint Ecosystem (PnP) – July 2020 Update
  11. Microsoft Docs: Get-PnPGroup
  12. Microsoft: What Is .NET Framework?
  13. Microsoft Docs: Format-List
  14. Microsoft Docs: List<T> Class
  15. Microsoft Docs: Group Class
  16. Microsoft Docs: Group Properties
  17. Microsoft Docs: Where-Object
  18. Microsoft Docs: About Comparison Operators

What CDN Usage Does for SharePoint Online (SPO) Performance

If you need the what’s what on CDNs (content delivery networks), this is a bit of quick reading that will get you up to speed with what a CDN is, how to configure your SPO tenant to use a CDN, and the benefits that CDNs can bring.

The (Not Entirely Obvious) TL;DR Answer

CDN

Since I’m taking the time to write about the topic, you can safely guess that yes, CDNs make a difference withSPO page operations. In many cases, proper CDN configuration will make a substantial difference in SPO page performance. So enable CDN use NOW!

The Basis For That Answer: Introduction

Knowing that some folks simply want the answer up-front, I hope that I’ve satisfied their curiosity. The rest of this post is dedicated to explaining content delivery networks (CDNs), how they operate, and how you can easily enable them for use within your SharePoint Online (SPO) sites.

Let me first address a misconception that I sometimes encountered among SPO administrators and developers (including some MVPs) – that being that CDNs don’t really “do a whole lot” to help site and/or page performance. Sure, usage of a CDN is recommended … but a common misunderstanding is that a CDN is really more of a “nice-to-have” than “need-to-have” element for SPO sites. Of the people saying such things, oftentimes that judgment comes without any real research, knowledge, or testing. Skeptics typically haven’t read the documentation (the “non-RTFM crowd”) and haven’t actually spent any time profiling and troubleshooting the performance of SPO sites. Since I enjoy addressing perf. problems and challenges, I’ve been fortunate to experience firsthand the benefits that CDNs can bring. By the end of this post, I hope I’ll have made converts of a CDN skeptic or two.

What Is A CDN?

Abstract Network

A CDN is a Content Delivery Network. There are a lot of (good) web resources that describe and illustrate what CDNs are and how they generally operate (like this one and this one), so I’m not going to attempt to “add value” with my own spin. I will simply call attention to a couple of the key characteristics that we really care about in our use of CDNs with SPO.

  1. A CDN, at its core, can be thought of as a system of distributed (typically geographically so) servers for caching and offloading of SPO content. Rather than needing to go to the Microsoft network and data center where your tenant is located in order to fetch certain files from SPO, your browser can instead go to a (geographically) closer CDN server to get those same files.
  2. By virtue of going to a closer CDN instead of the Microsoft network, the chance that you’ll have a “bigger pipe” with more bandwidth – and less latency/delay – are greater. This usually translates directly to an improvement in performance.
  3. In addition to giving us the opportunity to download certain SPO files faster and with less delay, CDNs can do other things to improve the experience for the SPO files they serve. For instance, CDN servers can pass files back to the browser with cache-control headers that allow browsers to re-serve downloaded files to other users (i.e, to users who haven’t actually download the files), store downloaded files locally (to avoid having to download them again for a period of time), and more.

If you didn’t know about CDNs prior to this post, or didn’t understand how they could help you, I hope you’re beginning to see the possibilities!

The Arrival Of The Office 365 CDN

It wasn’t all that long ago that Microsoft was a bit more “modest” in its use of CDNs. Microsoft certainly made use of them, but prior to the implementation of its own content delivery networks, Microsoft frequently turned to a company called Akamai for CDN support.

When I first started presenting on SharePoint and its built-in caching mechanisms, I often spoke about Akamai and their edge network when talking about BLOB caching and how the max-age cache-control header could be configured and misconfigured. Back then, “Akamai” was basically synonymous with “CDN,” and that’s how many of us thought about the company. They were certainly leading the pack in the CDN service space.

Back then, if you were attempting to download a large file from Microsoft (think DVD images, ISO files, etc.), then there was a good change that the download link your browser would receive (from Microsoft’s servers) would actually point to an Akamai edge node near your location geographically instead of a Microsoft destination.

Fast forward to today. In addition to utilizing third-party CDNs like those deployed by Akamai, Microsoft has built (and is improving) their own first-party CDNs. There are a couple of benefits to this. First, many data regulations you may be subject to that prevent third-party housing of your data (yes, even in temporary locations like a CDN) can be largely avoided. In the case of CDNs that Microsoft is running, there is no hand-off to a third party and thus much less practical concern regarding who is housing your data.

Second, with their own CDNs, Microsoft has a lot more latitude and ability to extend the specifics of CDN configuration and operation its customers. And that’s what they’ve done with the Office 365 CDN.

Set Up The O365 CDN For Tenant’s Use

Now we’re talking! This next part is particularly important, and it’s what drove the creation of this post. It’s also the one bit of information that I promised Scott Stewart at Microsoft that I would try to get “out in the wild” as quickly and as visibly as possible.

So, if you remember nothing else from this post,please remember this:

Set-SPOTenantCdnEnabled -CdnType Public -Enable $true

That is the line of PowerShell that needs to be executed (against your SPO tenant, so you need to have a connection to your tenant established first) to enable transparent CDN support for public files. Run that, and non-sensitive files of public origin from SPO will begin getting cached in a CDN and served from there.

The line of PowerShell I shared goes through the SharePoint Online Management Shell – something most organizations using SPO (and their admins in particular) have installed somewhere.

It is also possible to enable CDN support if you’re using the PNP PowerShell module, if that’s your preference, by executing the following PowerShell:

Set-PnPTenantCdnEnabled -CdnType Public -Enable $true

No matter how you enable the CDN, it should be noted that the PowerShell I’ve elected to share (above) enables CDN usage for files of public origin only. It is easy enough to alter the parameters being passed in our PowerShell command so as to cover all files, public and private, by switching -CdnType to Both (with the SPO management shell) or executing another line of PowerShell after the first that swaps –type Public with –type Private (in the case of the SharePointPnP PowerShell module).

The reason I chose only public enablement is because your organization may be bound by restrictions or policies that prohibit or limit CDN use with private files. This is discussed a bit in the O365 CDN post originally cited, but it’s best to do your own research.

Enabling CDN support for public files, however, is considered to be safe in general.

What Sort Of Improvements Can I Potentially See?

I’ve got a series of images that I use to illustrate performance improvements when files are served via CDN instead of SPO list/library, and those files are from Microsoft. Thankfully, MS makes the images I tend to use (and a discussion of them) free available, and they are presented at this link for your reading and reference.

The example that is called out in the link I just shared involves offloading of the jQuery JavaScript library from SPO to CDN. The real world numbers that were captured reduced fetch-and-load time from just over 1.5 seconds to less than half a second (<500ms). That is no small change … and that’s for just one file!

The Other (Secret) Benefit Of CDNs

I guess “Secret” is technically the wrong choice of term here. A more accurate description would be to say that I seldom hear or see anyone talking about another CDN benefit I consider to be very important and significant. That benefit, quite simply, involves improving file fetching and retrieval parallelism when a web page and associated assets (CSS, JS, images, etc.) are requested for download by your browser. In plain English: CDNs typically improve file downloading by allowing the browser to issue a greater number of concurrent file requests.

To help with this concept and its explanation, I’ve created a couple of diagrams that I’ll share with you. The first one appears below, and it is meant to represent the series of steps a browser might execute when retrieving everything needed to show a (SharePoint/SPO) page. As we’ve talked about, what is commonly thought of as a single page in a SharePoint site is, more accurately, a page containing all sorts of dependent assets: image files, JavaScript files, cascading style sheets, and a whole bunch more.

A request for a SharePoint page housed at http://www.thesite.com might start out with one request, but your browser is going to need all of the files referenced within the context of that page (default.aspx, in our case) to render correctly. See below:

To get what’s needed to successfully render the example SharePoint page without CDN support, we follow the numbers:

  1. Your browser issues an HTTP request for the page you want to load – http://www.thesite.com/default.aspx in the case of example above.
  2. That page request goes to (and is served by) the web server/front-end that can return the page.
  3. Our page needs other files to render properly, like styling.css, logo.png, functions.js, and more. These get queued-up and returned according to some rules – more on this in a minute.
  4. In step four (4), files get returned to the browser. Notice I say “no more than six at a time” in the illustration. That’s important and will come into play once we start introducing CDN support to the page/site.

You might be wondering, “Only six files at a time? Really? Why the limitation?” Well, I should start by saying the limit is probably six … maybe a bit more, perhaps a bit less. It depends on the browser you’re using what the specific number is. There was a good summary answer on StackOverflow to a related (but slightly different) question that provides some additional discussion.

Section eight (8) of the HTTP specification (RFC 2616) specifically addresses HTTP connections, how they should be handled, how proxies should be negotiated, etc. For our purposes, the practical implementation of the HTTP specification by modern browsers generally limits the number of concurrent/active connections a browser can have to any given host or URL to six (6).

Notice how I worded that last sentence. Since you folks are smart cookies, I’ll bet you’re already thinking “Wait a minute. CDNs typically have different URLs/hosts from the sites they cache” and you’re imaging what happens (or can happen) when a new source (i.e., different host/URL) is introduced.

This illustration roughly outlines the fetch process when a CDN is involved:

Steps one (1) through four (4) of the fetch process with a CDN are basically still the same as was illustrated without a CDN a bit earlier. When the page is served-up in step three (3) and returned in step four (4), though, there are some differences and additional activity taking place:

  1. Since at least one CDN is in-use for the SPO environment, some of the resource links within the page that is returned will have different URLs. For instance, whereas styling.css was previously served from the SPO environment in the non-CDN example, it might now be referenced through the CDN host shown as http://cdn.source.com/styling.css
  2. The requested file is retrieved, and …
  3. Files come back to the client browser from the CDN at the same time they’re being passed-back from the SPO environment.

Since we’re dealing with two different URLs/hosts in our CDN example (http://www.thesite.com and cdn.source.com), our original six (6) file concurrent download limitation transforms into a 12 file limitation (two hosts serving six files a time, 2 x 6 = 12).

Whether or not the CDN-based process is ultimately faster than without a CDN depends on a great many factors: your Internet bandwidth, the performance of your computer, the complexity/structure of the page being served-up, and more. In the majority of cases, though, at least some performance improvement is observed. In many cases, the improvement can be quite substantial (as referenced and discussed earlier).

Additional Note: 8/24/2020

In a bit of laziness on my part, I didn’t do a prior article search before writing this post. As fate would have it, Bob German (a friend and fellow MVP – well, he was an MVP prior to joining Microsoft a couple of years back) wrote a great post at the end of 2017 that I became aware of this morning with a series of tweets. Bob’s post is called “Choosing a CDN for SharePoint Client Solutions” and is a bit more developer-oriented. That being said, it’s a fantastic post with good information that is a great additional read if you’re looking for more material and/or a slightly different perspective. Nice work, Bob!

Post Update: 8/26/2020

Anders Rask was kind enough to point out that the PnP PowerShell line I originally had listed wasn’t, in fact, PnP PowerShell. That specific line of PowerShell has since been updated to reflect the correct way of altering a tenant’s CDN with the PnP PowerShell cmdlets. Many thanks for the catch, Anders!

Conclusion

So, to sum-up: enable CDN use within your SPO tenant. The benefits are compelling!

References

  1. Microsoft Docs: Use The Office 365 Content Delivery Network (CDN) With SharePoint Online
  2. Imperva: What Is A CDN?
  3. Akamai: What Does CDN Stand For?
  4. MDN Web Docs: Cache-Control
  5. Company: Akamai
  6. Presentations: Caching-In For SharePoint Performance
  7. Akamai: Download Delivery
  8. Microsoft Docs: Configure Cache Settings For A Web Application In SharePoint Server
  9. Blog Post: Do You Know What’s Going To Happen When You Enable The SharePoint BLOB Cache?
  10. LinkedIn: Scott Stewart
  11. Microsoft Docs: Enabling O365 CDN support for public origin files.
  12. Microsoft Docs: Get Started With SharePoint Online Management Shell
  13. Microsoft Docs: PnP PowerShell Overview
  14. Microsoft Docs: Set Up And Configure The Office 365 CDN By Using PnP PowerShell
  15. Microsoft Docs: What Performance Gains Does A CDN Provide?
  16. Push Technologies: Browser Connection Limitations
  17. StackOverflow: How many maximum number of simultaneous Chrome connections/threads I can start through Selenium WebDriver?
  18. W3.org: RFC 2616, Section 8: Connection

One Tool to Rule Them All

Microsoft released the second iteration of its Page Diagnostics Tool for SharePoint. If you have an SPO site, you NEED this tool in your toolbox!

Last week, on Wednesday, September 18th, 2019, Microsoft released the second iteration of its Page Diagnostics Tool for SharePoint. An announcement was made, and the Microsoft Docs site was updated, but the day passed with very little fanfare in most circles.

“The One Ring” by Mateus Amaral is licensed under CC BY-NC-ND 4.0 

In my opinion, there should have been fireworks. Lots of fireworks.

What is it?

If you’re not familiar with the Page Diagnostics Tool for SharePoint, then I need to share a little history on how I came to be “meet” this tool.

Back in 2018, the SharePoint Conference North America (SPCNA) was rebooted after having been shutdown as part of Microsoft’s consolidation of product-specific conferences a number of years earlier. I had the good fortune of making the cut to deliver a couple of sessions at the conference: “Making the Most of OneDrive for Business and SharePoint Online” and “Understanding and Avoiding Performance Pitfalls with SharePoint Online.”

Sometime in the months leading up to the conference, I received an email from out-of-the-blue from a guy named Scott Stewart – who at the time was a Senior Program Manager for OneDrive and SharePoint Engineering. In the email, Scott introduced himself, what he did in his role, and suggested that we collaborate together for the performance session I was slated to deliver at SPCNA.

I came to understand that Scott and his team were responsible for addressing and remedying many of the production performance issues that arose in SharePoint Online (SPO). The more that Scott and I chatted, the more it sounded like we were preaching many of the same things when it came to performance.

One thing Scott revealed to me was that at the time, his team had been working on a tool to help diagnose SPO performance issues. The tool was projected to be ready around the time that SPCNA was happening, so I asked him if he’d like to co-present the performance session with me and announce the tool to an audience that would undoubtedly be eager to hear the news. Thankfully, he agreed!

The audience for our performance talk at SPCNA 2018

Scott demo’d version one (really it was more like a beta) during our talk, and the demo demons got the better of him … but shortly after the conference, v1.0 of the tool went live and was available to download as a Chrome browser extension.

So, what does it do?

Simply put, the Page Diagnostics Tool for SharePoint analyzes your browser’s interaction with SPO and points out conditions and configurations that might be adversely affecting your page’s performance.

The first version of the tool only worked for classic publishing pages. And as a tool, it was only available as a Google Chrome Extension:

The Page Diagnostics for SharePoint extension in the Google Chrome Store

The second iteration of the tool that was released last Thursday addresses one of those limitations: it analyzes both modern and classic SharePoint pages. So, you’re covered no matter what’s on your SPO site.

What Can the Tool Tell Me?

For one thing, the tool can get you the metrics I’ve highlighted that are relevant to diagnosing basic page performance issues – most notably, SPRequestDuration and SPIisLatency. But it can do so much more than that!

Many of the adverse performance conditions and scenarios I’ve covered while speaking and in blog posts (such as this one here) are analyzed and called-out by the tool, as well as many other things/conditions, such as navigational style used, whether or not content deployment networks (CDNs) are used by your pages, and quite a few more.

And finally, the tool provides a simple mechanism for retrieving round-trip times for pages and page resource requests. It eliminates the need to pull up Fiddler or your browser’s debug tools to try and track down the right numbers from a scrolling list of potentially hundreds of requests and responses.

How Do I Use It?

It’s easy, but I’ll summarize it for you here.

1. Open the Chrome Web Store. Currently, the extension is only available for Google Chrome. Open Chrome and navigate to https://chrome.google.com/webstore/search/sharepoint directly or search for “SharePoint” in the Chrome Web Store. However you choose to do it, you should see the Page Diagnostics Tool for SharePoint entry within the list of results as shown below.

2. Add the Extension to Chrome. Click the Add to Chrome button. You’ll be taken directly to the diagnostic tool’s specific extension page, and then Chrome will pop up a dialog like the one seen below. The dialog will describe what the tool will be able to do once you install it, and yes: you have to click Add Extension to accept what the dialog is telling you and to actually activate the extension in your browser.

3. Navigate to a SharePoint Online page to begin diagnosing it. Once you’ve got the extension installed, you should have the following icon in the tool area to the right of the URL/address bar in Chrome:

To illustrate how the tool works, I navigated to a modern Communication Site in my Bitstream Foundry tenant:

I then clicked on the SharePoint Page Diagnostics Tool icon in the upper right of the browser (as shown above). Doing so brings up the Page Diagnostics dialog and gives me some options:

Kicking off an analysis of the current page is as simple as clicking the Start button as shown above. Once you do so, the page will reload and the Tool dialog will change several times over the course of a handful of seconds based on what it’s loading, analyzing, and attempting to do.

When the tool has completed its analysis and is ready to share some recommendations, the dialog will change once again to show something similar to what appears below.

Right off the bat, you can see that the Page Diagnostics Tool supplies you with important metrics like the SPRequestDuration and SPIIsLatency – two measures that are critical to determining where you might have some slowdown as called out in a previous blog post. But the tool doesn’t stop there.

The tool does many other things – like look at the size of your images, whether or not you’re using structural navigation (because structural navigation is oh so bad for your SPO site performance), if you’re using content delivery networks (CDNs) for frequently used scripts and resources, and a whole lot more.

Let’s drill into one of the problem items it calls out on one of my pages:

The tool explains to me, in plain English, what is wrong: Large images detected. An image I’m using is too large (i.e., larger than 300KB). It supplies the URL of the image in question so that I’m not left wondering which image it’s calling out. And if I want to know why 300KB is special or simply learn about the best way to handle images in SharePoint Online, there’s a Learn More link. Clicking that link takes me to this page in Microsoft Docs:

Targeted and detailed guidance – exactly what you need in order to do some site fixup/cleanup in the name of improving performance.

Wrapping-Up

There’s more that the tool can do – like provide round trip times for pages and assets within those pages, as well as supply a couple of data export options if you want to look at the client/server page conversation in a tool that has more capabilities.

As a one-stop shop tool, though, I’m going to basically start recommending that everyone with an SPO site start downloading the tool for use within their own tenants. There is simply no other tool that is easier and more powerful for SharePoint Online sites. And the price point is perfect: FREE!

The next time you see Scott Stewart, buy him a beer to thank him for giving us something usable in the fight against poorly performing SPO sites.

References and Resources

  1. Company: Microsoft
  2. Browser Extension: Page Diagnostics for SharePoint
  3. Microsoft Docs: Use the Page Diagnostics for SharePoint tool
  4. Conference: The SharePoint Conference North America
  5. Presentation Resource: Making the Most of OneDrive for Business and SharePoint Online
  6. Presentation Resource: Understanding and Avoiding Performance Pitfalls with SharePoint Online
  7. LinkedIn: Scott Stewart
  8. Blog Post: The Five-Minute Page Performance Troubleshooting Guide for SharePoint Online
  9. Blog Post: Caching, You Ain’t No Friend of Mine
  10. Tool: Telerik Fiddler
  11. Web Page: Chrome Web Store Extensions
  12. Microsoft Docs: Optimize images in SharePoint Online modern site pages

Obtaining Performance Metrics for SharePoint Online Modern Pages

In this post, I’ll show you how to obtain page performance core metrics from Modern SharePoint Online pages. It’s easier and more reliable than trying to obtain the same data from classic pages.

Background

It was quite some time ago that I wrote my Five-Minute Page Performance Troubleshooting Guide for SharePoint Online – a little over a year-and-a-half ago, actually. Since that time, SharePoint Online (SPO) has continued to evolve relentlessly. In fact, one slide I’ve gotten into the habit of showing during my SPO talks and presentations is the following:

FiveYearWarning

The slide usually gets the desired response of laughter from attendees, but it’s something I feel I have to say … because like so many things that seem obvious, there’s some real life basis for the inclusion of the slide:

OldPost

The exchange shown above was the result of someone commenting on a post I had shared about limitations I was running into with the SharePoint App Model. The issue didn’t have a solution or workaround at the time I’d written my post, but Microsoft had addressed it sometime later.

BestBeforeDateThis brief exchange highlights one of the other points I try hard to make while speaking: PAY ATTENTION TO DATES! It’s not safe to assume (if it ever was) that something you read online will stay accurate and/or relevant indefinitely.

In any case, I realize that much of what I share has a “born on date,” for lack of a better label. I’ll continue to share information; just note when something was written.

End of (slight) rant. Back to the real topic of this post.

Modern Pages

Since I had written the previous performance article, Microsoft’s been working hard to complete the transition to Modern SharePoint in SPO. I feel it’s a solid move on their part for a variety of reasons. Modern pages (particularly pages in communication sites) are much more WYSIWYG in nature, and SharePoint Framework (SPFx) web parts on modern pages make a whole lot of sense from a scalability perspective; after all, why assume load on the server (with classic web parts) when you can push the load to the client and use all the extra desktop/laptop power?

As good as they are, though, modern pages don’t obey the standard response header approach to sharing performance metrics. But not to worry: they do things more consistently and reliably (in my opinion).

Performance on a Modern Page

SPRequestDuration (the amount of time the server spent processing the page request) and (SP)IISLatency (the amount of time the page request waited on the server before getting processed) are critical to know when trying to diagnose potential page performance issues. Both of these are reported in milliseconds and give us some insight into what’s happening on the server-side of the performance equation.

Instead of trying to convey these values with response headers (as classic pages do – most of the time), modern pages share the same data within the body of the page itself.

Consider the following page modern page:

PerfPage

If this were a classic publishing page and we wanted to get the (SP)IISLatency and SPRequestDuration, we’d need to use our browser’s <F12> dev tools or something like Fiddler.

For modern pages, things are easier. We turn instead to the page source – not the response headers. Grab the page source (by right-clicking and selecting View page source) …

PerfPageSource

… and you’ll see something like the following:

SourceMetrics

Now, I’ll be the first to admit that you’ve got to have some sense of what you’re seeking within the page source – there’s a lot of stuff to parse through. Doing a simple <CTRL><F> search for iislatency or requestduration will land you on the content of interest. We’re interested in the metrics reported within the perf section:

PerfUpClose

The content of interest will be simple text, but the text is a JSON object that can be crunched to display values that are a bit easier to read:

Metrics

The other thing you’ll notice is that a lot of additional metrics are reported along with the page processing metrics we’ve been looking at. In a future post, I’ll try to break some of these down for you.

Conclusion

“Modern” is the future of SharePoint Online. If you haven’t yet embraced modern lists and pages, consider dipping your toe in the waters. As we’ve seen in this post, Modern also makes it easier to obtain performance metrics for our pages – something that will make page performance troubleshooting significantly more predictable and consistent.

References and Resources

  1. Blog Post: Five Minute Page Performance Troubleshooting Guide for SharePoint Online
  2. Office.com: SharePoint Classic and Modern Experiences
  3. Office.com: What Is A SharePoint Communication Site?
  4. Microsoft.com: Overview of the SharePoint Framework
  5. MDN: Response Header
  6. Telerik: Fiddler
  7. JSON Viewer: Code Beautify

The Five-Minute Page Performance Troubleshooting Guide for SharePoint Online

I regularly hear from SharePoint Online customers that their pages are slow … but they don’t know where to start troubleshooting. Is it the SPO servers? The network? Their page(s)? In this post, I’ll show you how to determine the general source of your slow pages in five minutes or less. It won’t solve your slow page(s) problem, but it will give you enough direction to know where to focus further analysis.

UPDATE (3/20/2018): As most of you who have been following-along in your own tenants know, this issue wasn’t actually truly resolved last September. For a while, in some cases, it looked like the SPIisLatency and SPRequestDuration headers came back. But the victory was fleeting, and since that time I’ve continued to get comments from people saying “but I don’t see them!” And while I had the headers for a while in my tenant, I haven’t seen them in any predictable fashion.

The good news is that after much hounding and making myself a royal pain-in-the-tuckus to Bill Baer and others at Microsoft, it looks like we FINALLY have the right engineering and dev teams engaged to look at this. We got traction on it this week, with multiple repro scenarios and Fiddler traces being passed around … so I’m truly hopeful we’ll see something before long. Stay tuned!

ItsBack

UPDATE (9/2/2017): As I was preparing slides for my IT/DevConnections talks, I decided to check on the issue of the missing Page Response Headers (SPIisLatency and SPRequestDuration). I went through three different tenants and several pages, and I’m happy to report that the headers now appear to be showing consistently. My thanks to Microsoft (I’ll credit Chris McNulty and Bill Baer – I had been pestering them) for rectifying the situation!

“Why is it so slow?” That’s how nearly every performance conversation I’ve ever had begins.

No one likes a slow intranet page, and everyone expects the intranet to just “come up” when they pop the URL into their favorite browser. From an end-user’s perspective, it doesn’t matter what’s happening on the back-end as long as the page appears quickly when someone tries to navigate to it.

SharePoint Online is a big black box to many of its users and consumers. They don’t understand what it takes to build an intranet, nor should they have to. The only thing that really matters to them is that they can bring up a browser, type in a URL, and quickly arrive at a landing page. The burden of ensuring that the site is optimized for fast loading falls to the folks in IT who are supposed to understand how everything works.

If you’re one of those folks in IT who is supposed to understand how everything works with SharePoint Online but doesn’t, then this blog post is for you. Don’t worry – I know there’s a lot to SharePoint Online, but performing some basic troubleshooting analysis for slow pages in SharePoint Online is pretty straightforward. I’ll share with you a handful of techniques to quickly ascertain if the reason for your slow pages is due to the content within the pages themselves, if the issue is network-related, or if there might be something else happening that is beyond your control.

Your Toolset

The first step in your performance troubleshooting adventure begins by opening up your browser from a client workstation. Everyone has a favorite browser, but I’m going to use and recommend Internet Explorer for this exercise because it has a solid set of development tools to assist you in finding and quantifying performance issues. In particular, it is able to chronologically list and detail the series of interactions that take place between your browser and the SharePoint Online web front-ends (WFEs) that are responding to your requests.

When recommending IE, some people ask “how come you don’t use Fiddler?” It’s a good question, and when I first started showing people how to do some quick troubleshooting, I’d do so with Fiddler. If you’re just starting out, though, Fiddler comes with one really big gotcha: operating inside an SSL tunnel. To get Fiddler (which is a transparent proxy) working with SSL, there is some non-trivial setup required involving certificate trusts. Since this is intended to be a quick and basic troubleshooting exercise, I figure it’s better to sidestep the issue altogether and use IE (which requires no special setup).

The Setup

To make this work, let us assume that I am attempting to profile the Bitstream Foundry (my company) intranet home page in order to understand how well it works – or doesn’t. My intranet home page is pretty plain by most intranet standards (remember: I’m a developer and IT Pro – not a designer), but it’s sufficient for purposes of discussion.

Step 1. Open Your Browser

I start by opening Internet Explorer and navigating to the Bitstream Foundry intranet home page at https://bitstreamfoundry.sharepoint.com. Once I move past the sign-in prompts, I’m shown my home page:

Bitstream Foundry Intranet Home Page

My home page has very little on it right now (I’m still trying to decide what would go best in the main region), but it is a SharePoint Online (SPO) page and it does work as a target for discussion purposes.

Step 2. Access the Developer Tools

Accessing the developer tools within Internet Explorer is extremely simple: either press F12, or go to the browser’s gear icon and select F12 Developer Tools from the drop-down that appears as seen below:

Accessing the IE Developer Tools

Doing either of these will pop-open the developer tools as either a stand-alone window or as a pane on the lower half of the browser as shown below:

Internet Explorer F12 Developer Tools

Step 3. PREPARE TO CAPTURE

When the developer tools first open, they’re commonly set to viewing the page structure on the DOM Explorer tab. For purposes of this troubleshooting exercise, we need to be on the Network tab so we can profile each of the calls the browser makes to the SPO WFE.

Select the Network tab and then select the “Always refresh from server” button as highlighted below in red.

Prepare for Capture

The Network tab is going to allow us to capture the series of exchanges between the SharePoint WFE and our browser as the browser fetches the elements needed to render the page. The “Always refresh from server” button is going to remove client-side caching from the picture by forcing the browser to always re-fetch all referenced content – even if it has a valid copy of one or more assets in the browser cache. This helps to achieve a consistent set of timing values between calls, and it’s also going simulate someone’s first-time visit to the page (which typically takes longer than subsequent visits) more accurately.

Step 4: Capture the Exchange

The next step is to capture the series of exchanges between IE and SPO. To do this, simply refresh the page by pressing the browsers Refresh button, pressing , or going to the browser’s address bar and re-issuing the page request.

The contents of the window on the Network tab will clear, and as content begins to flow into the browser, entries will appear on the screen. For every request that IE makes of SharePoint Online, a new line/entry will appear. It will probably take a handful of seconds to retrieve all page assets, and it’s not uncommon for a SharePoint page to have upwards of 75 to 100 resources (or more) to load.

Capture the Exchange with SPO

Strictly speaking, you shouldn’t have to stop the capture once the page has loaded, but there are several reasons why you would want to.  First, you will eventually retrieve all SharePoint assets necessary to render the page. If you continue to capture beyond this point, you’ll see the number of requests (represented in the bottom bar of the browser – the number is 83 requests in the screenshot above) continue to tick up. It will slowly go up over time and it’s not due to the contents of the SharePoint page – it’s due to Office 365.

If you look at the last entry in the screenshot above, you’ll see that it’s a request to https://outlook.office365.com/owa. In short: this is due to a background process that allows Exchange to notify you when you receive new messages and calendar/event notifications. See how the Protocol and Result/Description columns indicate a (Pending) state?

If you get to this point and additional SharePoint elements are no longer loading, press the red “recording stop” button in the toolbar of Network tab. This will stop the capture. Not only does this help to keep the captured trace “cleaner,” but it also prevents excessive distortion of certain values – like overall time to load and the graphical representation of the page load (shown on the far right of the Network tab) as shown below.

Page Timeline Distortion

Step 5: Find the SharePoint Page Request

At this point, you should have a populated Network tab with the entire dialog of requests that were needed to render your page. Of these requests, the overwhelming majority of them will be for JavaScript files (.js), cascading stylesheets (.css), and images (.png, .gif, and .jpg). Only one of them will be for the actual SharePoint page itself (.aspx) … and, of course, this is the request that you need to find in the list.

My intranet home page is named Home.aspx (as can be seen in the browser address bar), so I need to find the request for Home.aspx on the Network tab. I got lucky with this dialog attempt, because Home.aspx is the first entry listed. Note that this isn’t always the case, and it’s not uncommon to find your page request 10 or 20 down in the list.

Select the ASPX Page

When you locate the entry in the list for your .aspx page, click on it to select it. You can confirm that you’ve selected the right entry by verifying Request URL on the Headers tab to the right of the various requests listed for the exchange with SPO (highlighted in the image above).

Step 6: Analyze the Headers

At this point, we need to shift our focus to the HTTP Response Headers that are passed back with the content of the page. Much like the request headers that the browser sends to the server to provide information about the request being made, the response headers that are sent from the server supply the browser with all sorts of additional information about the page. This can include the size of the page (Content-Length), the payload (Content-Type), whether or not the page can be cached (Cache-Control), and more.

Making sure that you have the Headers tab selected, locate and record the three response headers as shown below:

Response Headers of Interest

The three values we want to record are:

  • SPIisLatency. This is a measure of the amount of time (in milliseconds) that the request spent queued and waiting to be processed by IIS (Internet Information Services – the web server). Ideally, it should be zero or very close to zero. In my example, the SPIisLatency is 3ms.
  • SPRequestDuration. This is the amount of time (again, in milliseconds) that it took to process the request on the server. Basically, this is the end-to-end processing time for the page. Healthy pages range from a couple hundred milliseconds to around a second depending on the content of the page. In my example, the SPRequestDuration is 249ms.
  • X-SharePointHealthScore. This is the value, from zero to ten, that indicates how heavily loaded the SharePoint Server is at the time when the page was served. A score of zero means the server is not under load, while a score of ten means the server is overloaded. As the X-SharePointHealthScore goes up, the server begins to selectively suspend work designated as “low priority,” like some Timer Service jobs, Search requests, and various other low-priority tasks. ideally, this value should be zero – or close to it. In my example, the value is zero.

We can infer a great deal about the page processing and network traversal of our page request with just these three values and a final number.

A quick note (2017-07-06): For some reason, a variety of SharePoint Online sites have been returning pages without the SPIisLatency and SPRequestDuration headers lately. I don’t know why this is happening, and I’ve reached out to Microsoft to see if it’s a bug or part of some larger strategy. I don’t think it’s deliberate, because the headers provide some of the only insight end-users can get into SharePoint Online page performance. When I hear something from the product team, I’ll post it here!

The Magical Trio: SPIisLatency, SPRequestDuration, and Total Trip Time

So, you’ve now got three numbers – two of which are helpful for page profiling (SPIisLatency and SPRequestDuration), and a third number (X-SharePointHealthScore) which will tell you how stressed the server was when it served your page. What can you do with them? As it turns out, quite a bit when you combine two of the three with a fourth number.

What is the fourth number? It’s the total trip time that is reported for the page being loaded, and it represents the elapsed time from the point at which the page was requested until the time when the last byte of the page was delivered. For example, I profiled my Bunker Tuneage site. It’s a SharePoint Online site (yes, I know – I have to get it moved to another location soon), so it makes a good target for analysis:

Bunker Tuneage Page Profile

In the above example, the three numbers we’re most interested in are:

  • Total Trip Time: 847.47ms
  • SPRequestDuration: 753ms
  • SPIisLatency: 0ms

If we think about what the individual values mean, we can now reason that the total amount of time spent to get the page (847.47ms), minus the total amount of time spent waiting or processing the server (753ms), should be roughly equal to the amount of time spent “elsewhere” – either in routing, traversing network boundaries, on proxies and firewalls, etc.

So, considering our numbers above, the equation looks like this:

Performance Equation

Based on our equation, this means that approximately (this isn’t exact) 94.47ms of time was spent getting from from the SharePoint Online server to our browser – not too shabby when we consider it.

The Permutations

The numbers could come out a variety of different ways when doing this, so it’s best if we try to establish a general trend. Variability between any two runs can be significant, so it’s in your best interests to conduct a number of runs (maybe a dozen) and come up with some average values.

Regardless of the specific values themselves, there are some general conclusions we draw about each value by itself – and when it is compared to the others.

  • High Total Time. The total end-to-end times can vary dramatically. The examples I’ve got shown thus far demonstrate sub-second latency (i.e., hundreds of milliseconds), and any time you can get values like that, it’s nothing to complain about. When your total round trip time climbs to two or three seconds, your generally still doing pretty good. If you hit five, six, or seven+ seconds, it’s time to move on to what to see what SPRequestDuration, SPIisLatency, and the time-spent-elsewhere values say.
  • High SPIisLatency. If you observe consistently high SPIisLatency values, they point to there being something wrong server-side, since a high SPIisLatency suggests that requests are backing up on the server. Although I’ve never seen it, I believe you could see high SPIisLatency for a brief period of time … but during that time, I’d also expect SharePoint Online to be spinning-up additional WFEs to deal with the effects of high user load. I’ve only ever seen SPIisLatency values in the single digits before, and they’ve never lasted beyond a request or two.
  • High “Time Lost ‘Elsewhere.'” If you crunch the numbers in the performance equation and come up with a significant amount of time being lost “elsewhere,” it suggests that the traffic between SharePoint Online and your computer is being slowed down for some reason. It doesn’t specifically indicate what is causing the slowdown, but the slowdown could be due to any number of network conditions: excessive routing, web proxies, egressing to the Internet out-of-region (a form of excessive routing), firewall issues, or a whole host of other conditions. What represents “excessive” time spent elsewhere? Again, I can only speak to trends here, but I tend not to get too upset about anything under 1s (1000ms) being lost to other factors. When time lost elsewhere grows to be high – especially compared to SPRequestDuration – that’s when I get concerned. For example, an SPRequestDuration of 800ms with a time-lost-elsewhere value of 2500ms makes me wonder what’s happening between SharePoint Online and my computer.
  • High SPRequestDuration. A high SPRequestDuration value can be caused by a variety of factors, and in truth the diagnosis tends to become a bit contentious. Since a high SPRequestDuration means that a page is taking a long time to process on the server, the most common response I frequently encounter (especially among those new to SPO) is that “there’s something wrong with SharePoint Online.” I hate to be the bearer of bad tidings, but repeat after me: “The problem isn’t with SharePoint Online, it’s with my site.” That 9000ms SPRequestDuration probably has very little to do with SPO and everything to do with how you customized SharePoint, your choice of navigation style, the fact that there are two dozen “expensive” web parts on the page, or something related to that. I’m not willing to rule out a problem with a SharePoint Online tenant, but in truth I have yet to encounter it.

What Can I Do About a High SPRequestDuration?

If you don’t believe me and instead feel that the problem is with the SharePoint Online environment, the good news is that there’s an easy way to tell one way or the other … and I highly recommend doing this before calling Microsoft Support (trust me, they’ll thank you for doing so).

Believe it or not, SharePoint Online is also where OneDrive for Business data is stored. A OneDrive for Business page, at its core, is a SharePoint page with nearly no customization. Using someone’s OneDrive for Business page becomes an excellent A/B test when the performance of SharePoint Online page is sub-par. Simply load up their OneDrive for Business page and compare performance numbers to the page in question.

OneDrive for Business Performance

Revisiting my Bunker Tuneage site example, you can see that the OneDrive for Business landing page is served from the same tenant as the earlier page. If I were to compare the SPRequestDuration value of the OneDrive for Business page (223ms) with the SPRequestDuration of the SharePoint page in-question (753ms), I’d note that the values differed … but are they different enough to think something is going awry in the SPO environment?

Roughly half a second (~500ms) is indeed a difference, but it’s not enough for me to think that the online environment has problems. When I see SPRequestDuration values like 9000ms for a SharePoint page but 500ms for OneDrive for Business page, that’s when I begin to suspect something is amiss. And again: with such an extreme disparity in values, SharePoint Online is healthy (500ms), but there’s clearly something wrong with my page (9000ms).

Practical Advice

When it comes to diagnosing the root cause or causes for high SPRequestDuration values, the good news is that there are plenty of fixes that range from the simple to the quite invasive. Microsoft has taken the time to compile some of the more common causes, and I highly encourage you to take a look if you’re interested.

At the end of the day, though, sometimes you just want to know where to begin troubleshooting so that you can focus remediation efforts. If you follow the steps outlined in this blog post, I think you’ll find that the five minutes they take to execute will help to focus you in the right area.

References and Resources

  1. MSDN: Discovering Windows Internet Explorer Developer Tools
  2. Company: Bitstream Foundry
  3. Telerik: Fiddler Web Debugging Proxy
  4. Fiddler: Decrypting HTTPS-protected traffic
  5. Mozilla Developer Network: HTTP Headers
  6. SPO Public Site: Bunker Tuneage Online
  7. Blog Post: Save Your SharePoint Online Public Site from the Chopping Block
  8. Office Support: Tune SharePoint Online Performance

Save Your SharePoint Online Public Site from the Chopping Block

If you’re like me and have one or more SharePoint Online public sites, you may or may not be aware that they’re currently on the chopping block! In this post, I describe what’s going to happen, and I also cover the process you can follow to extend the life of your SPO public site for another year.

The Guillotine
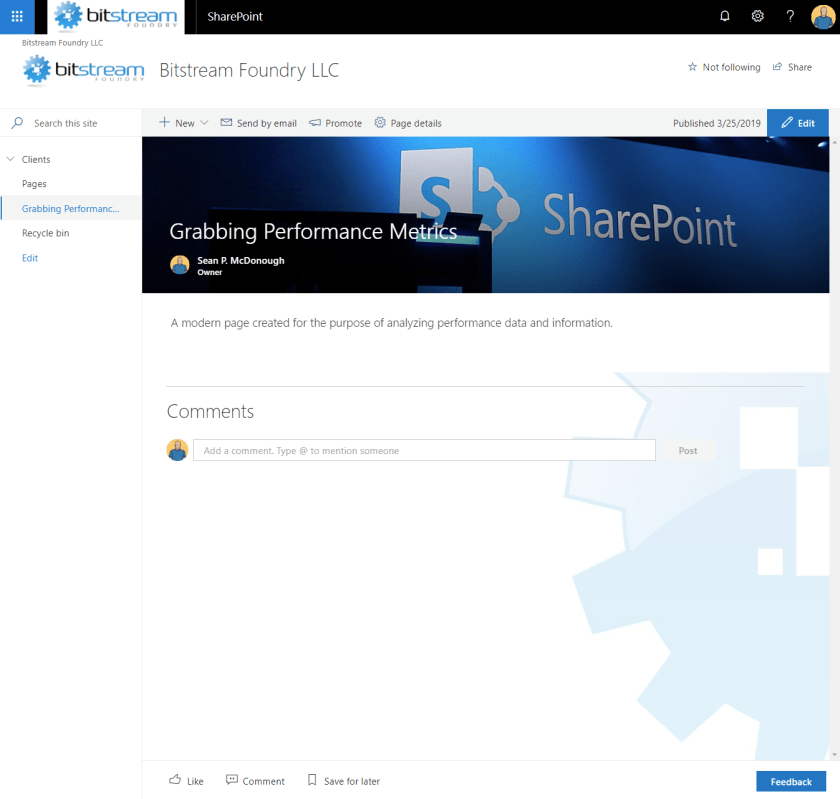
I’ve been very concerned about the fate of my SharePoint Online (SPO) public sites as of late. It’s March of 2017, and I know that Microsoft intends to pull the plug on all of those SPO public sites in the not-so-distant future. I have three of them myself: one for my wife’s non-profit organization (for which I’m also the CTO), one for my LLC, and a final one for my musical labor of love.

A while back, I pleaded with Microsoft publicly to give us some help before they shut things down for the SPO public sites. Well, it would seem that we’ve been given some help in the form of an end-of-life reprieve.

I had heard about the possibility of Microsoft pushing the deadline for the “ya gotta move it” date for SPO public sites, but I hadn’t been looking all that closely to see if there was any movement on that front. Since this month is due to close out in the next few days, I decided I’d better actually take a look. So, I went into one of my tenants and found what I’d hoped to find:

Postponing Deletion

Thank the Heavens!

If you’re like me and you haven’t been tracking things as closely as you might have liked, it turns out that you can spare your SharePoint Online public site a cruel and horrible death for roughly another year (i.e., until March 31 of 2018). The process for delaying your site’s demise is relatively straightforward and described in the body of this support article. If you want something a bit more visual, though, then the following walk-through might help you out.

  1. selectAdminSign in to your Office 365 tenant with a set of credentials that have the necessary rights to make changes to SharePoint Online settings. Go ahead – click the link I just supplied.
  2. Click on the waffle menu in the suite links bar near the top of the page. The waffle menu is opened by clicking those nine dots (arranged like a Rubik’s Cube). When you click the waffle menu button, you’ll get a menu with a bunch of tiles that looks something like the image above. You’re interested in the Admin button right now.
  3. Admin CenterClick the Admin button, and you’ll be taken to your tenant’s Admin center as shown on the right. I’ve branded my Bitstream Foundry tenant, so chances are your admin center is going to look different than mine – perhaps with a different color scheme and logo. Note that if your organization hasn’t assigned a logo, you won’t see one in the suite links bar.
  4. Admin centers drop-downAlong the left-hand side of the Admin center will be a set of collapsed drop-downs that represent your various administrative functions and management pages/areas. You’ll want to click on the Admin centers option at the bottom of the list to expand it as shown on the right. When you do this, you should see SharePoint listed between your Skype for Business and OneDrive options.
  5. SharePoint admin optionsClick on the SharePoint option, and you’ll be taken to the SharePoint admin center for your tenant. You’ll see the list of site collections that exist within your tenant in the main window area, and a toolbar will appear above the main window area providing you with options to create a new site collection, buy storage, and quite a bit more. you’ll also see the list of SharePoint-specific admin areas/options appear along the left-hand side of the admin page as shown to the right.
  6. Locate the settings option in the left-hand column and click it. Once you click it, you’ll see a whole host of settings that you can review and change. It is in this list that you’ll find the Postpone deletion of SharePoint Online public websites option buttons that I showed a bit earlier.
  7. Click on the I’d like to keep my public website until March 31, 2018 option button to pull your SPO public site off of death row.
  8. Scroll to the bottom of the page and click the OK button along the right-hand side of the page. This will save your change.

Save your changes!

That’s all there is to it!

Can’t You Just Give Me the Shortcut?

Sure! If you’re not into clicking through all of the admin screens and options I just walked through, you can simply point your browser at https://{tenantName}-admin.sharepoint.com/_layouts/15/online/TenantSettings.aspx to get to the page which is shown in Step #6 above. Note that you’ll need to replace the {tenantName} token in the URL above with the actual name of your tenant to make this work for you.

A Few Notes

This process buys you roughly another year to get your act together and move your SPO public site. You’ll then have until March 31 of 2018 to locate another home for your site and/or its content.

If you don’t follow the process I’ve outlined, Microsoft calls out the following dates:

  • Beginning May 1, 2017, anonymous access for your SPO public site will be removed.
  • On September 1, 2017, Microsoft will be deleting SPO public sites which haven’t been protected via the opt-in I described above. If you haven’t saved your SPO public site content by 9/1, you’re going to lose it!

Hopefully you’ll rest a bit easier (as I have been doing) after opting-in to protect your public site(s). I intend to get my sites moved before next March, and I’ll likely detail that process in a future post. But for now … deep breaths!

References and Resources

  1. Site: The Schizophrenia Oral History Project
  2. Site: Bitstream Foundry LLC
  3. Site: Bunker Tuneage
  4. Post: Help, We Are Stranded on SOPSI (SharePoint Online Public Site) Island
  5. Microsoft Support: Information about changes to the SharePoint Online Public Websites feature in Office 365
  6. Site: Rubik’s Cube
%d bloggers like this: